How Do I Use Hively with Zendesk?
Date: May 9th, 2012 | Category: Integrations
https://support.teamhively.com/integrations/use-hively-zen-desk/
It’s easy to insert Hively rating snippets into Zendesk. This way, you can measure customer satisfaction for each of your team members through you Zendesk email templates. Here’s how to do it.
A few things you’ll need:
- An account created in Hively with your users added
- A Zendesk.com account
Hively Instructions
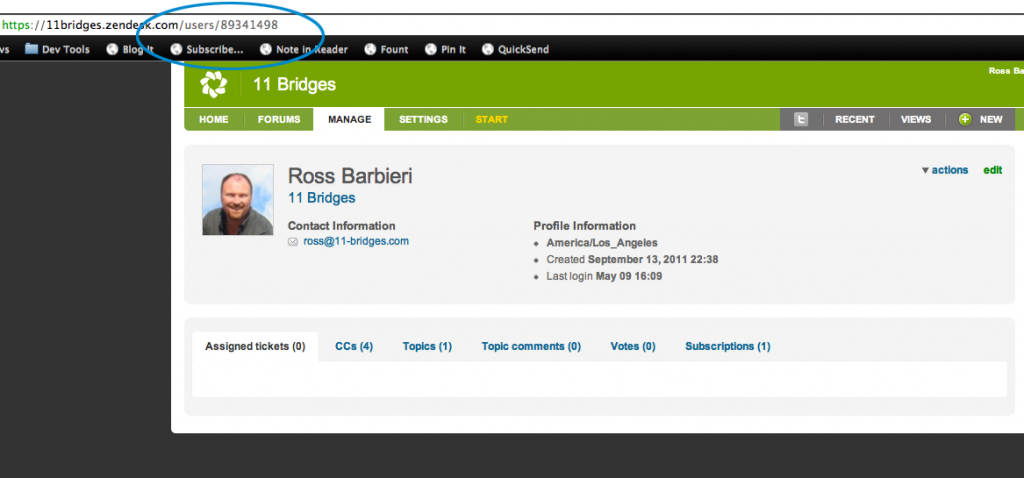
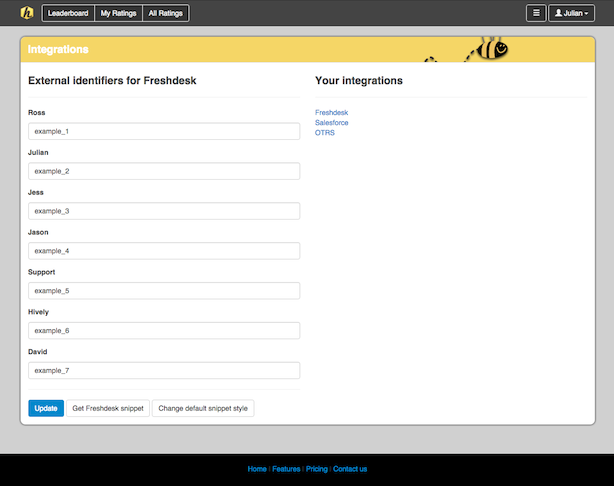
As an Account Administrator, select Integrations from the main menu under Configuration. Next, enable the integration by simply selecting Zendesk from the list. A list of your users will now appear. Find the Zendesk User ID for each user and type it in next to their name. You can find this ID by copying the ID part of the URL of a Zendesk profile for any of your users.
Now, click the ‘Get Zendesk Snippet’ button. The snippet in the pop up is the Snippet you’ll cut and paste into your Zendesk email template. This snippet will be your default snippet in Hively.
Zendesk Instructions
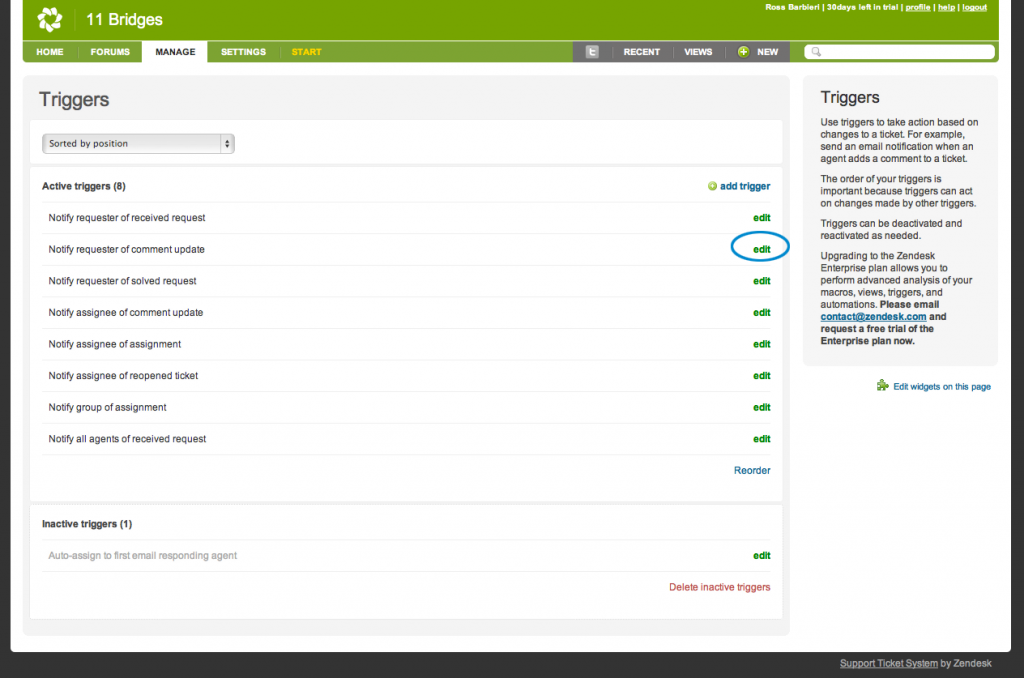
The best way to use Hively links with Zendesk is to use Zendesk Triggers. The most commonly used Trigger is called: “Notify requester of comment update” ( Manage -> Triggers & email notificaitons ). This will let you choose whether your customers can provide feedback on only solved tickets, every comment added, or any custom triggers you have set up. Choose the default “Notify requester of comment update” and paste the HTML version of the Hively snippet into the bottom part of the ‘Email Body’ section. Note: it important that you copy the HTML version of the snippet. To do this, click ‘Show HTML’ and copy contents of the textbox.
An alternative is to put hively links in each agent signature. These signatures do not support html, but it will display a simple link to your rating page. To put a hively link in the agent signature, you must do the following:
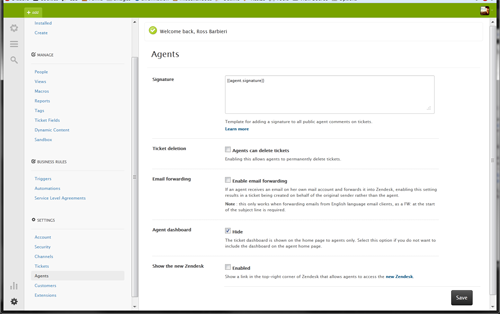
Step 1: Make sure the value of the global Agents Signature field is set to {{agent.signature}}. This allows each agent to have their own custom signature that will display in all correspondences. This allows your internal personnel to have different signatures than your customer users.
Step 3: Within Hively, select Snippets from the main menu. Next to the Plain Text snippet, click the Set As Default button. Next, select Integrations from the main menu. Select Zendesk and click the Get Zendesk Snippet button. Copy the snippet.
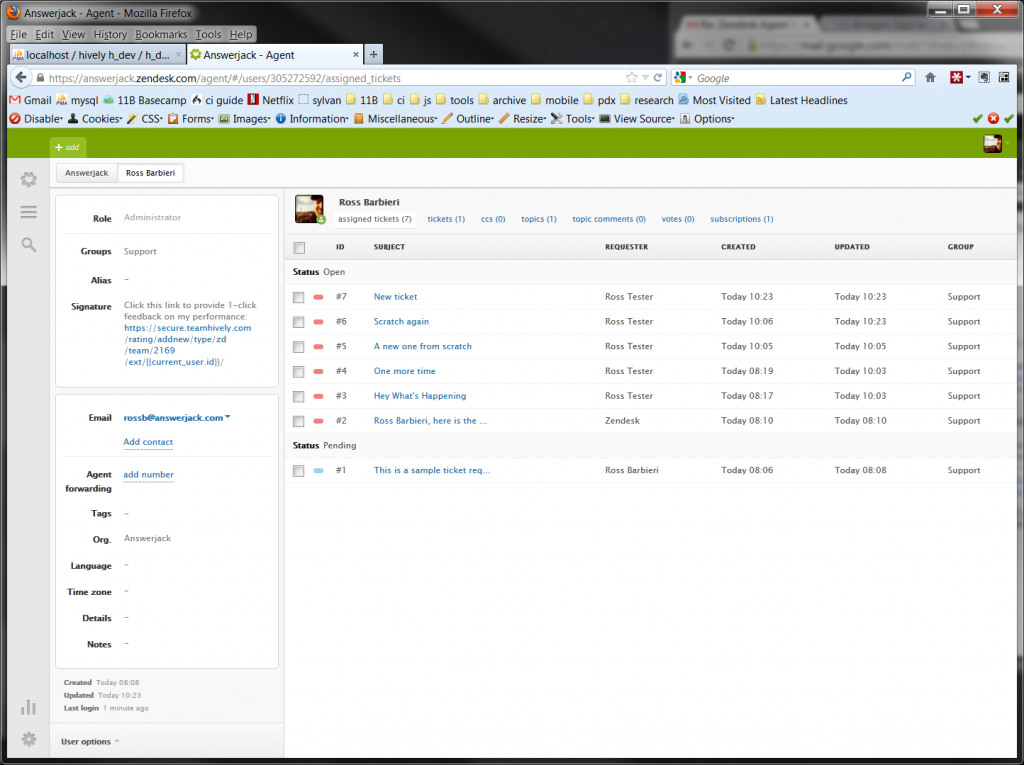
Step 3: Back in Zendesk, go to the profile page for each user that needs the hively link and edit the Signature and paste your integration snippet.
It will look something like this:
Ta Da! Finished.
If you follow these instructions you will have successfully connected your Hively and Zendesk accounts. Your customers will now be able to give your customer facing team members feedback on the service they provide and you will be able to track and measure that feedback in Hively.
Article published on Hively - https://support.teamhively.com
